Monday, December 17, 2018

Birthday Wishes

Hi there and welcome back!  It's time for a new Color Challenge at Splitcoaststampers and I am hosting this week!  I've chosen Lovely Lipstick, Daffodil Delight and Basic Gray for the colors this week, with a dessert option to add a tag.


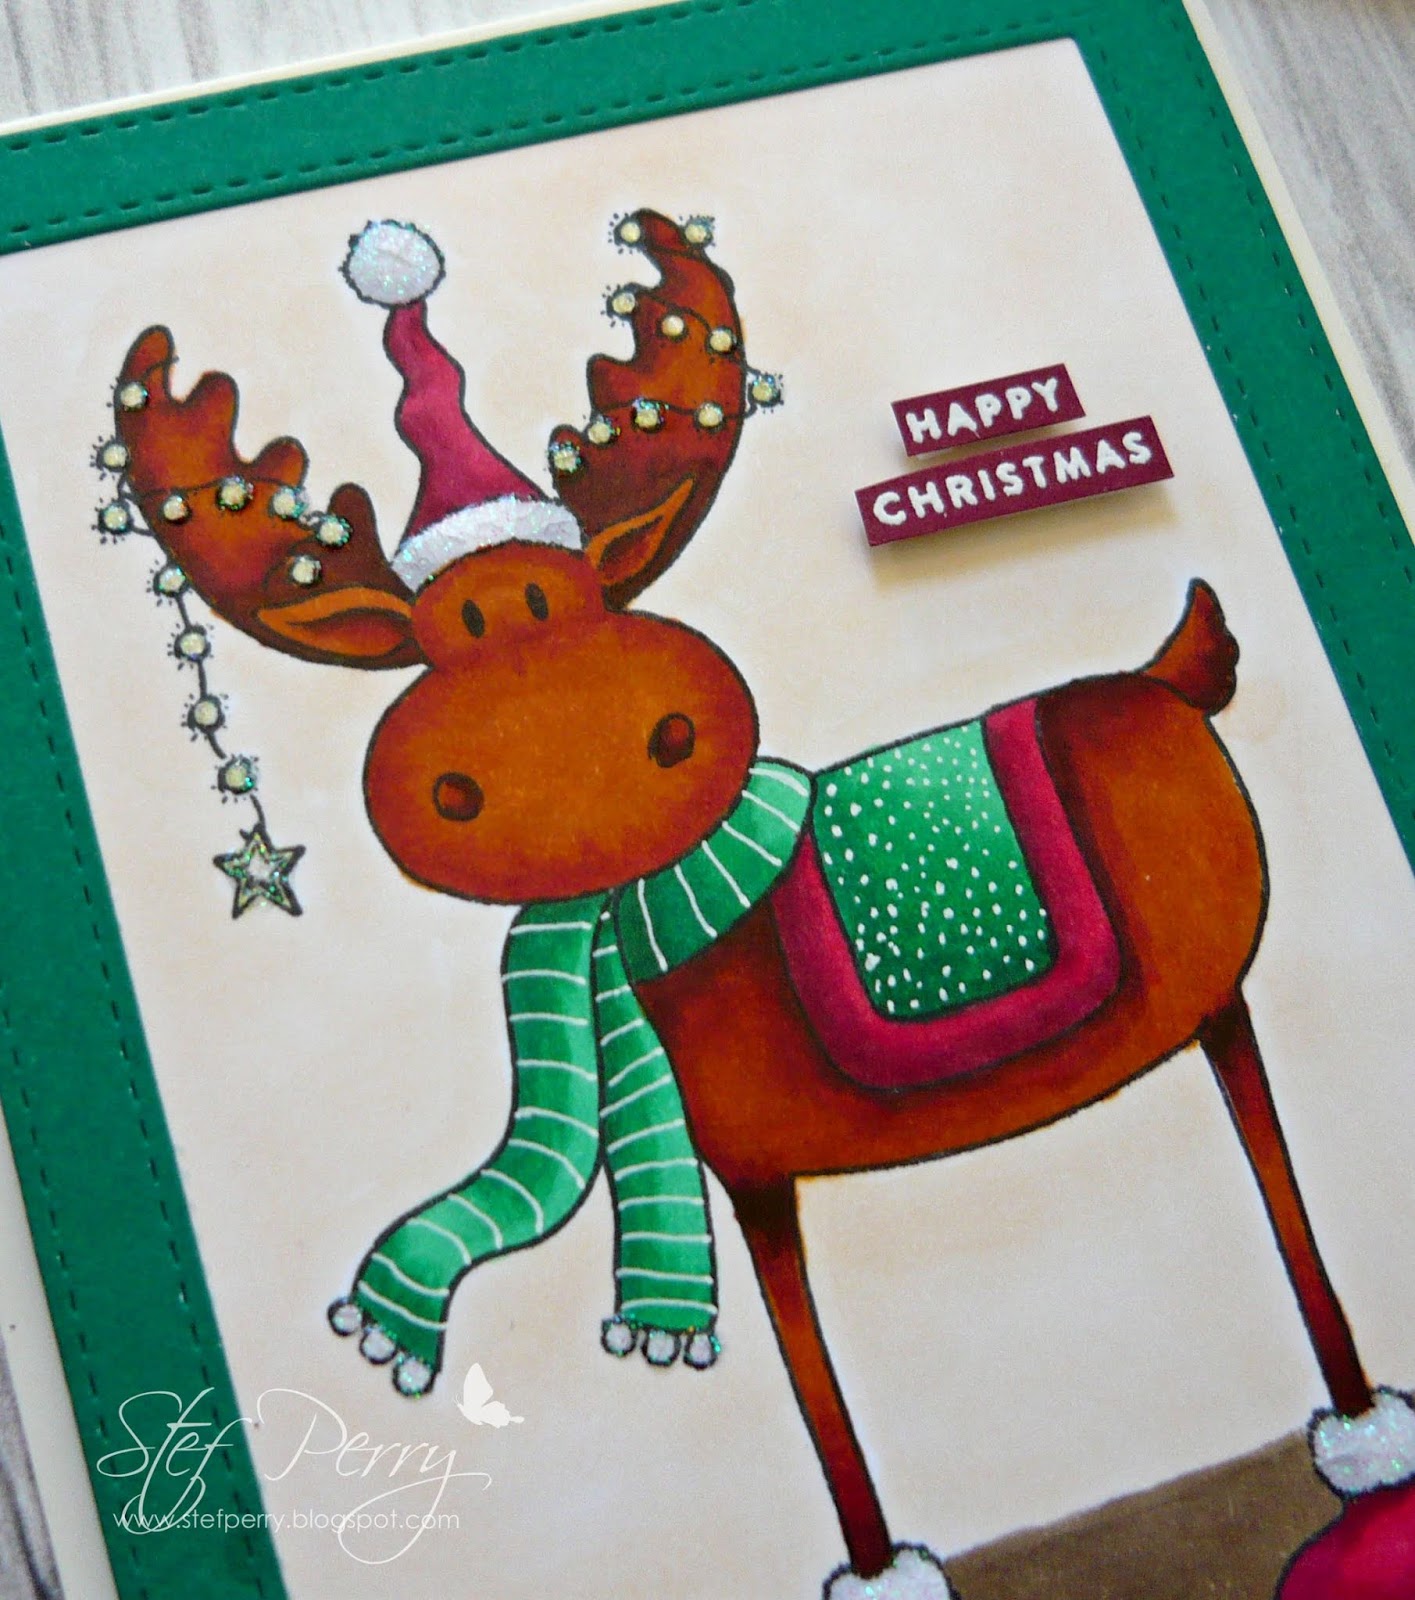
I had a vision of what I wanted my card to look like but as I watercolored the images and tried to create the background, it just wasn't what I wanted (okay, it was awful!!).  So I went back to square one and decided to use the same images but color the main flower with Copic markers and have the majority of the other stamped images be white or uncolored.  I've seen a lot of cards with this design idea over the last year so I thought I would give it try.


After finishing the stamping and Copic coloring, I used the matching dies to cut out the images.  The pieces were then layered on a white panel previous die cut with a stitched, scallop rectangle die.  I used some Linen Thread to gently wrap around the panel and attach the die cut sentiment tag, then mount the panel on a gray card base.


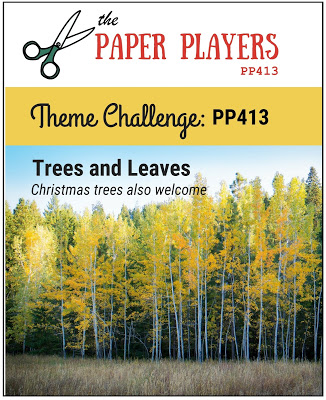
Thanks so much for visiting, it's always so appreciated!  I've added a link to the challenge above, so I hope you'll swing over there and find time to join in!

Stef


Product details
Stamps:  Beautiful Day (Altenew), Tiny Words (Simon Says Stamp)
Paper:  Neenah Solar White, Slate (SSS), Lovely Lipstick (SU)
Ink:  Gina K. Amalgam, Versamark
Other:  Tags & Labels Framelit (SU), Beautiful Day matching dies, Card Front Builder Elements Stitched Scallop rectangle die (SugarPea), Linen Thread
Copic markers:
Flower:  V000, Y15, 02, 000
Berries:  RV 29, 25, 23

Thursday, December 13, 2018

Christmas Ornament

Hi there!  Well, I thought I was done with Christmas cards by last weekend, but then had one more to make, so I decided to use the color challenges at The Paper Players and Color Throwdown for my card, as both are very similar.  My color of choice for the PP challenge is Kraft.  I'm also joining the current Simon Says Stamp Wednesday Challenge where the theme this week is Christmas.

PP422


I decided to use the beautiful Pinecone Decoration stamp for my final (I think!) Christmas card of 2018, coloring it with Copic markers.


When the coloring was complete, I cut down the panel to just under 4" x 5.25", added the Shaded Spruce die cut frame and adhered the entire thing to the Neenah Desert Storm card base.  To add some sparkle, the ribbon and "berries" were painted with an aqua shimmer pen, then used crystal glaze to top the berries.  The top of the ornament hanger just kind of ended in space, so I cut off the legs of a gold brad and adhered it to the top for a nicer finish.


Thanks so much for your visit, I always appreciate it so much!  I've added links to the challenges above, so be sure to visit!

I'll be back next Monday evening with the new Color Challenge at Splitcoaststampers.  I'm hosting this week so I hope you will check it out!

Stef


Product details
Stamps:  Pinecone Decoration (Stampendous)
Paper:  Neenahs Solar White and Desert Storm, Shaded Spruce (SU)
Ink:  Gina K Amalgam
Other:  Stitched Rectangle Frame (MFT), brad from stash, Tonic Nuvo Aqua Shimmer pen and Crystal Glaze, Copic markers

Ribbon:  R35, 37, 39
Leaves:  G02, 17, 28
Flowers:  C0, 3
Pinecone:  E21, 23, 25, 27, 29
Berries:  R29, 43
 

Monday, December 10, 2018

Perfect Blend

Hi there!  It's time for a new Color Challenge at Splitcoaststampers!  Karen is hosting this week and she has chosen Petal Pink, Mint Macaron and Highland Heather, with the dessert option to add stripes. 

I'm also joining the current Mojo Monday challenge with this fabulous sketch by Miss Julee!


To me, this week's colors seemed 1940's retro, especially the pink and mint together.  I decided to make a fun coffee themed card that would work either for a friend or a sweetheart.


I used images and a sentiment from the Hero Arts August 2018 kit, stamping two of the coffee cups, coloring them with Copic markers in colors similar to the Color Challenge.  Masking was used to add the whipped cream to the tall cup and both were fussy cut.  Copic markers were used to color both the bottom of the circle and the pink strip across the middle.  The polka dots on the pink strip and the stripes on the coffee cups were added with a white gel pen. 

As I started putting together the card together, I realized the Highland Heather card base looked a little bare, so I inked up a background stamp with white pigment ink, which gave it a nice subtle design.


Thanks for visiting, it's always so appreciated!  I've added links to both Mojo Monday and SCS above, so I hope you'll check out both challenges!

Stef


Product details
Stamps:  Hero Arts August 2018 kit, Deco Diamonds Background stamp (Simon Says Stamp)
Paper:  Neenah Solar White, Highland Heather
Ink:  Gina K Amalgam, Hero Arts Unicorn White
Other:  Hero Arts Infinity Nesting Circle die, Sentiment Label die (SSS), retired Stampin' Up embossing folder, White Gelly Roll pen, Copics-R20, 22, BG 11, 34, 49, G00, W0, W1, W3, BV31, E21, 25, 29
 

Monday, December 3, 2018

Kindness

Hi there and welcome back!  It's time for a new Color Challenge at Splitcoaststampers!  Jeanne is hosting this week and has chosen the lovely combination of Melon Mambo, Blushing Bride and Pear Pizzazz, with a dessert option to add foliage.

I'm also joining the Anything Goes Challenge at Simon Says Stamp Wednesday Challenge.

Well, with these colors, there was no question I was going to color up a floral image hahaha!  I chose a stamp that I has seen no love since it arrived in my craft room in September, so I decided this was way past time to do so.


This lovely magnolia image was the result of a joint effort between Simon Says Stamp and Clearly Besotted during the SSS Stamptember event this year.  I ended up using Copic Markers in colors similar to those for the challenge.  For the stamen added a dark pink to the tips then used a white gel pen to color the base.  Once the coloring was complete the matching die was used to cut it out and the flower was painted with an Aqua Shimmer pen, which is captured really well in the photo below.  For the background, a foliage cover die was embossed on a piece of Pear Pizzazz paper, trimmed down and adhered to the white card base with Fun Foam.  After adding the die cut flower and sentiment, I finished the card with a few sparkling clear sequins.


Thanks for visiting, it's always so appreciated!  I do hope you'll be able to join the Color Challenge at SCS this week!

Stef


Product details
Stamps:  Magnificent Magnolia (SSS/Clearly Besotted)
Paper:  Neenah Solar White, Pear Pizzazz
Ink:  Gina K Amalgam, Versafine Onyx Black
Other:  Sparkling Clear sequins (PPP), Sentiment Label die, Leafy Frame die (SSS), White Gelly Roll pen, Tonic Nuvo Aqua Shimmer pen, Copics:  RV21, 23, 25, 09; YG 91, 95, 97
 

Monday, November 26, 2018

Christmas Time

Hello again!  It's time for a new Color Challenge at Splitcoaststampers!  Mary is hosting this week and she has chosen a beautiful combination of Tranquil Tide, Lemon Lime Twist and Gold, with a dessert option to use enamel or Nuvo drops.  I totally forgot about dessert as I was making my card, so no additional embellies this week.


I decided to make my own background on the Tranquil Tide panel and gold heat emboss the images.  I used a variety of little stamps from the October 2017 My Monthly Hero kit, all of them centered around fun little Christmas images.  Using a Misti, I laid out about 2/3rds of the design on the panel, stamped and heat set, then rearranged the remainder of the design.  After adhering the completed panel to the Lemon Lime Twist card base, the word Merry was die cut and the word Christmas stamped and heat embossed.  Both were added to a vellum circle to finish things off.


Thanks for visiting, it's always so appreciated!  I've added a link to SCS above, so I hope you'll check out this week's Color Challenge!

Stef


Product details
Stamps:  My Monthly Hero October 2017
Paper:  Neenah Solar White, Tranquil Tide, Lemon Lime Twist, Vellum, Tonic Gold Mirror
Ink:  Versamark
Other:  Hero Arts Gold embossing powder, Stitched Shapes Circle Framelit (SU), Merry die (SSS)
 

Sunday, November 25, 2018

Sketch Lotus Flowers for Ellen

Hello friends and thanks for visiting!  I'm sharing a card made for a fellow card maker on Splitcoaststampers.  She has gone through medical treatments that have resulted in her inability to participate in the hobby she once enjoyed so much. 

One of the things I love about SCS is the caring and kindness extended to the entire community of stampers, especially a weekly "challenge" to extend a little love and kindness to someone in need.  This week it is Ellen.  She loves pink and gold, and dramatic backgrounds, so I gave it my best with this card.  I've also used the weekly SCS Sketch Challenge for my card design.

I began by making the background for the floral image by ink blended Tattered Rose, Worn Lipstick and Festive Berried Distress Ink on Bristol paper.  After spritzing with water droplets, I used a heat tool to dry the ink, then splattered the panel with gold paint and used the same around the edges.  I set it aside to dry while I used Copic markers to color the floral image.  Once dry it was adhered to a white card base with a fun foam backing for dimension.


I used a Misti to initially stamp the floral image with Copic friendly ink, leaving the stamp in the Misti after cleaning it off, so when the coloring was complete, I put the panel back in the stamp positioner, inked up the stamp with Versamark, then heat set the image with gold embossing powder.  After this was complete, I die cut the image and used foam tape to mount it on the ink blended panel and the last step was to add the sentiment circle to the base of the floral image.


Thanks so much for visiting and I hope you'll use the links below to check out both challenges!

Tea Party for Ellen

SCS Sketch Challenge #724


Stef


Product details
Stamps:  Sketch Lotus Flowers, Tiny Words (both Simons Says Stamp)
Paper:  Neenah Solar White, Strathmore Bristol
Ink:  Gina K Amalgam, Versamark, Distress Ink-Tattered Rose, Worn Lipstick, Festive Berries
Other:  Gold Sequin Mix, Stitched Rectangle die (SSS), Stitched Shapes Circle (Stampin' Up), Altenew Antique Gold embossing powder, Gansai Tambi Starry Colors Gold watercolor paint
 

Monday, November 19, 2018

Moose in Search of Snow

Hi there and welcome back!  It's time for a new Color Challenge at Splitcoaststampers!  Pam is hosting this week and has chosen the combination of Merry Merlot, Shaded Spruce and Very Vanilla, with the dessert option to add sparkle or shimmer.

It seemed like there was something everyday recently that prevented me from working on my card for this weeks challenge.  I finally made time yesterday, had it all finished then realized my moose in his charming Nordic attire was standing on bare ground, not snow.  Oops and too late to make a new card!  So, I decided he was just a moose still in search of the snow, kind of like here in the Pacific NW where it has been unseasonably dry this fall.


I did add some sparkle with White Blizzard Crystal Drops on his string of lights along with the "fur" on his hat and boots.  I also used a White Gelly Roll Pen to add polka dots to his blanket and stripes to his neck scarf.


Thanks for visiting, it's always so appreciated!  I've added a link to SCS above, so I hope you'll head over there and check out the challenge!

Stef


Product details
Stamps:  Nordic Christmas (Crafter's Companion), Tiny Words Christmas (Simon Says Stamp)
Paper:  Neenah Solar White, Thick Very Vanilla, Merry Merlot, Shaded Spruce
Ink:  Gina K Amalgam, Versamark
Other:  Stitched Rectangle Frame (MFT), Tonic Nuvo White Blizzard Crystal Drops, Copic Markers, Hero Arts White embossing powder, White Gelly Roll pen
 

Sunday, November 18, 2018

Holly Jolly Snowman

Hello friends!  I'm posting a couple of cards made for the Online Card Classes Clean and Simple Holiday class.  The last live class ended Friday but the class galleries are open for a few more days, so I thought I would upload what I've completed thus far.  When I signed up for the class my week looked wide open, but you know how that goes, right?  Life gets in the way of crafting, so I didn't get as many cards done for class as I wanted.  The nice thing is that once the class is purchased, you have lifetime access, so I can continue to mine all that great inspiration for additional cards!  Here's a link to OCC, I encourage you to check it out if you haven't before.


This first card was made for the Day One where various inking techniques were shared.  I used Laurie Willison's technique using painters tape to mask.  After drying the blended strips I used a stencil to add "snowflakes" with white pigment ink.  The final touch was to add the cute snowman, sentiment and embellishments.  Super fun and would be easy to replicate.  In fact, I did make a couple others but didn't have a chance to edit the photos.  Maybe I'll have a chance to share later this week.


The second card (Day 2 - die cuts) uses a shaker design shared by Jennifer McGuire.  Rather than use acetate for the window, this technique uses white tulle, which eliminates the need for foam tape, thus making the card more mail friendly.  I made a stencil from vellum with a snowflake cover die then pounced white pigment ink through it with an ink blending tool, then added some additional ink around the edges.  I tended to make these CAS designs a bit more complicated but it still wasn't super time consuming to make this card, so making multiples would be possible.


My final card was for Day 3 - Glitter and Foil.  Kristina Werner showed us a beautiful example of added glitter paste with a stencil then mounting a sentiment when the paste was dry.  This card was quicker to put together than the last one once the glitter paste was dry.  The sentiment was die cut from gold mirror card stock adhered to the vellum strip then adhered to the back of the panel before adding to the card base.  I LOVE all the glitter plus the elegance of the gold sentiment.

Thanks for taking time to visit, I sure appreciate it! 

Stef

Product details
Card 1
Stamps:  Winter Woodland Wonders (Avery Elle), Halftone Holidays (sentiment/Altenew)
Paper:  Neenah Solar White, Cherry Cobbler (SU)
Ink:  Gina K Amalgam, Distress Oxide Mermaid Lagoon, Hero Arts Unicorn White
Other:  Companion dies to stamp sets, Snowflake embellies, Tonic Nuvo White Blizzard Glitter Drops and Glitter Gloss Aqua Shimmer pen (used on snowman), Copic markers

Card 2
Stamps:  Tiny Words Christmas (SSS)
Paper:  Neenah Solar White, Schoolhouse Red, Slate, Silver Foil
Ink:  Hero Arts Unicorn White, Versamark
Other:  Merry die (SSS), Ornate Ornaments die (SSS), Snowflake Confetti Fancy Die (HA), Lucy's Iridescent Jewels, sequins from my stash, Silver Gelly roll pen

Card 3
Paper:  Midnight Green, Vellum
Other:  Holiday Tree Medallion stencil (SSS), Tonic Nuvo Moonstone Glimmer paste, Merry Christmas Flourish die (Impression Obsession)
 

Bamboo Rose Birthday

Hi there and welcome back!  I have a quick post with my card for Mojo Monday, joining the current challenge just under the deadline. 


I took some liberties with the sketch, adding a layered circle under the primary circle just to get the offset look, because I added my little bamboo rose bouquet too high up.  But it also gave me a place to add some sparkly jewels, so I was okay with that!


The flowers and butterfly are from the Bamboo Rose stamp set from Altenew.  I really like the stylized look of the images, but I do find coloring these type of floral images a bit tricky to get the shading right.  But when it was all done I was happy with how it turned out. 


Thanks so much for taking time to visit my little corner of the blogosphere!  I've added a link to the current Mojo challenge above, and if you check out Julee's blog tomorrow the new challenge should be posted.

Stef


Product details
Stamps:  Bamboo Rose (Altenew), Petite Pairs (sentiment/ret.SU)
Paper:  Neenah Solar White, Rich Razzleberry, BoBunny "Early Bird" patterned paper
Ink:  Versafine Onyx Black, Gina K Amalgam
Other:  Flutter embossing folder (SU), Stitched Shapes Circle Framelit (SU), Paper Snips, Tonic Nuvo Aqua Shimmer pen

Copics:

Butterfly:  Y17,13,00
Leaves:  G00,02,09
Roses:  V01,05,06,09
 

Monday, November 12, 2018

Merry & Bright

Hi there and welcome back!  It's time for a new Color Challenge at Splitcoaststampers!  Barbara is hosting this week and she has chosen the fun combination of Balmy Blue, Berry Burst, Pineapple Punch and Granny Apple Green, with a dessert option of NBUS (Never Before Used Stamp).  For my card I used a never before used Suzy's Paintable Print, so I may have squeaked by with dessert!


This fun print of various stocking caps was colored with multiple Copic markers in colors similar to the challenge colors.  I varied the color mixes for each hat then used a white gelly roll pen to add additional patterns.  It took some time to color but it sure was fun!  The panel had a winter themed sentiment but I wanted more of a Christmas sentiment, so I stamped one on white card stock die cut it along with the Berry Burst layer, then popped up in the middle of the card with foam tape.


The main panel was also trimmed down and mounted on a longer Berry Burst panel then adhered to the white card base.  A few iridescent jewels were scattered about as a final sparkly touch.

Thanks for visiting, it's always so appreciated!  I've added a link to the Color Challenge above, it would be great if you were able to join us this week!

Stef


Product details
Stamps:  Nordic Christmas (sentiment/Crafter's Companion)
Paper:  Neenah Solar White, Berry Burst, Suzy's Paintable Prints
Ink:  Versafine Onyx Black
Other:  Layered Scallop Square Framelits, White Gelly Roll pen, Black 0.3 Copic Multiliner pen, Lucy's Iridescent Jewels, Copic Markers

Friday, November 9, 2018

Full of Thanks

Hi there and welcome back!  Each year we send out just a few Thanksgiving cards to close family and for this year I used an image from the fun Full of Thanks stamp set from Art Impression. I kept the cards super simple so they would be easy enough to duplicate, the Copic coloring taking up the most time.


Isn't he cute in his Groucho Marx disguise?  The Ai packaging always has colored examples, so I basically used their shading to help speed up the coloring time.  Also, it's such a small image, it's tough to get too many color blends, so for the tail feathers I used only one or two colors.

The panel had already been die cut with a stitched rectangle die before stamping and coloring, so all that remained to do when the coloring was complete was to adhere it to a card base, add the burlap ribbon with a bit of liquid glue with the sentiment popped up with a bit of foam tape.


I'm entering this card in the Simon Says Stamp Wednesday Challenge for this week's theme of Thanks or Thanksgiving.  I've added a link below so you can check out the challenge.


Thanks for visiting, it's always appreciated!  I'll be back with a card for Mojo Monday sometime this weekend plus I will post my DT card for the latest Splitcoaststampers Color Challenge Monday night, so drop by and take a peek!

Stef


Product details
Stamps:  Full of Thanks (Ai)
Paper:  Neenah Solar White, Pumpkin Pie (SU), Burnt Orange (SSS)
Ink:  Gina K Amalgam, Versafine Onyx Black
Other:  5/8" Burlap Ribbon, 1" square and 1 1/4" Postage Stamp punches (both ret. SU), Stitched Rectangle die (SSS), Black Glaze Gelly Roll Pen, Copic Markers

Nose:  E 51, 00, 13
Snood:  R27, 39
Glasses: YR27
Body:  E21, 23, 25, 27, 29
Tail:  E25, 27, 29 YR23, 27
Legs:  Y35, 38
Shading:  C2,00
 

Monday, November 5, 2018

Ornate Ornaments

Hi there and welcome back!  It's time for a new Color Challenge at Splitcoaststampers!  I'm hosting this week and have chosen the combination of Coastal Cabana, Pool Party, Mossy Meadow and Silver, with the dessert option of using heat embossing.  I'm also joining the current Simon Says Stamp Wednesday Challenge where the theme is Anything Goes. 


I love light blue and blue green colors for Christmas cards and decided to use them with the beautiful Ornate Ornaments stamp set from Simon Says Stamp.  I left the stamps in my Misti after inking up on Neenah Solar White card stock to color with Copic markers similar to the challenge colors.  Once the coloring was complete I reinserted the panel into the Misti, stamped with Versamark ink, heat embossed with silver embossing powder, the die cut with the coordinating dies.


The background was created on a piece of watercolor paper that I splashed with water using a #12 round paintbrush then dropped in Mossy Meadow ink.  Once dry, a stiff paintbrush was used to flick Mossy Meadow ink then Copic Opaque white (hard to see) on the panel, then it was sprayed with Sparkle Shimmer Spray.  It was then die cut once it dried the second time.  The ornaments were adhered with Silver Cord taped on the back then wrapped around the reverse side of the panel.  After the sentiment was added, the panel was adhered first to a Pool Party panel with fun foam then the entire thing to a white card base.


Thanks so much for visiting, it's always so appreciated!  I've added a link to the challenges above and I hope you'll check them out!

Stef


Product details
Stamps:  Ornate Ornaments (SSS), Birdie Brown Greetings Galore (sentiment/MFT)
Paper:  Neenah Solar White, Coastal Cabana, Pool Party, watercolor
Ink:  Mossy Meadow, Versamark
Other:  Ornate Ornaments companion dies and Stitched Rectangle die (both SSS), Silver Cord (ret.SU), Hero Arts Silver embossing powder, Copic Opaque white, Tsukineko Sparkle Sheer Craft Spray, Copic Markers
 

Monday, October 29, 2018

Pinecone Decoration

It's time for a new Color Challenge at Splitcoaststampers!  Karen is hosting this week and she has chosen the beautiful combination of Blueberry Bushel, Cherry Cobbler and Bermuda Bay, with the dessert option to add shimmer. 

I decided to use the beautiful Pinecone Decoration image from Stampendous, using Copic markers in colors similar to the challenge colors.  I love the gorgeous bow which is the star of this image and thought it would look wonderful in that deep royal blue color.


Initially I tried coloring the flowers in Bermuda Bay colors but it just didn't look right with the blue bow.  So on my second attempt I kept them white, shaded with grays, then put a teal glow around the outside of the image and backed the panel with one of Bermuda Bay card stock.  I didn't find a sentiment that fit appropriately so I'll add one on the card interior.

To capture the dessert option, I used a shimmer pen on the ribbon and berries (somewhat more visible in the picture below) and then used shimmer paste through the Falling Snow stencil on the Blueberry Bushel panel, letting dry before assembling the card.  The final touch was to add a retired SU pearl at the top of the "cord" hanging the decoration.


Thanks so much for visiting, it's always so appreciated!  I've added a link to SCS above, so I hope you'll head over there and join us this week!

Stef


Product details
Stamps:  Pinecone Decorations (Stampendous)
Paper:  Neenah Solar White, Bermuda Bay, Blueberry Bushel
Ink:  Gina K Amalgam
Other:  Falling Snow Stencil (SSS), Tonic Nuvo Moonstone Shimmer pen and Moonstone Shimmer paste, retired Pearl, Copic markers
 

Thursday, October 25, 2018

Cardinal Snowman

Hello and welcome back!  Today's card is one made for Mojo Monday...what a minute, didn't Mojo Monday say farewell back in June this year?  Well, yes, the founder Julee Tilman decided to end the challenge blog so she could focus on her young family.  However, she continues to post on her personal blog Poetic Artistry and has decided to continue the challenge there on a limited basis.  Oh my, that made me so happy as Mojo Monday was one the first challenge blogs with which I participated oh so many years ago and Julee is one terrific sketch designer!  So, here is the current sketch and link to that post.


I recently acquired a cute snowman stamp set and decided to use it for my card.  I colored the images with Copic markers and die cut them with the companion dies.  When looking to put my card together I realized I needed to swap the sides of the circles.


I love the cute snowman with the cardinals taking up roost on his arms.  The smaller circle has a layer of trees adhered directly to the circle then the cardinal and snowbank popped up on foam tape as was the snowman.  A shimmer pen was used to add sparkle to the snowman, the snow beneath the little cardinal and the red panel layered on the white card base, which unfortunately I wasn't able to capture on camera, but you can see the sparkly blizzard drops on the trees.  I used some long retired Stampin' Up patterned paper in Garden Green for the rectangle panel before adding the two circles.  The final touch was to add some jewels from Lucy's Little Things.


Thanks so much for visiting, it's so appreciated!  Be sure to use the link above to enjoy all the beautiful inspiration!

Stef


Product details

Stamps:  Snowman Cardinals (Stampendous), Holiday Home (sentiment/ret. SU)
Paper:  Neenah Solar White, Garden Green, Cherry Cobbler
Ink:  Gina K Amalgam, Versafine Onyx Black
Other:  Copic markers, Snowman Cardinals companion dies, Hero Arts Nested Infinity Circle dies, White Gelly Roll pen, Tonic Nuvo Aqua Shimmer Pen and White Blizzard Glitter Drops, Lucy's Little Things Iridescent Jewels
 

Friday, October 12, 2018

Grateful Friend

Hi there and welcome back!  Fall has turned pretty spectacular here in Western Oregon, which helped inspire the card I'm sharing with you today.  That and the wonderful color challenge at Sunday Stamps and fabulous sketch from Freshly Made Sketches!

SSC189

FMS358

Once again I pulled out my current favorite fall stamp set, BB Fall Friends.  I can't get enough of the cute images that are just perfect for fall.  I colored the images with Copic markers then die cut them with companion dies.


The background panel was die cut from retired So Saffron textured card stock, then adhered to a white card base.  On a separate piece of Bristol card stock I ink blended the background for my little scene then die cut with a Stitched Shape Circle framelit.  The primary images and sentiment were adhered then it was popped up on the card base with foam tape.  A couple of leaves evidently floated off the pile behind the girl and her little squirrel, and ended up below the scene. :-)


Thanks for visiting, I really appreciate it!  I hope you'll use the links above and check out both challenges!

Stef


Product details
Stamps:  Birdie Brown Fall Friends (MFT)
Paper:  Neenah Solar White, Pumpkin Pie, Textured So Saffron, Koh-I-Noor Bristol
Ink:  Gina K Amalgam, Versamark, Distress Inks:  Tumbles Glass, Scattered Straw, Spiced Marmalade
Other:  Stitched Rectangle Die (SugarPea Designs), Stitched Shapes Framelit (SU), MFT Cloud stencil, Brutus Monroe Alabaster embossing powder
Copics:  Coat, boots, leaves:  R08, YR07,12 BG 11,13; Pumpkin: YR18,07,14; Skirt, Scarf, Hat:  BG 11,13,09; Hair:  E23,25,29; Skin: E00,11,50, R20; Squirrel:  E51, 53, 37
 

Monday, October 8, 2018

Gratitude

Hello again!  It's time for a new Color Challenge at Splitcoaststampers!  Pam is hosting this week and she has chosen the lovely combination of Real Red, Garden Green and So Saffron, with a "dessert" option of stenciling. I'm also joining the SCS Free For All challenge to make a small or long tall card. 

I'm also joining the current challenge at The Paper Players, with a theme challenge of leaves or trees. 

PP413

Originally I was going to make a Christmas card with the challenge colors but when my first attempt ended up in the trash bin, I decided an autumn themed card would work perfectly.  I used a Tim Holtz stencil and Festive Berries, Mowed Lawn and Scattered Straw Distress Inks to sponge the leaves through the stencil on a Bristol panel, then lightly added Antique Linen over the background and Walnut Stain around the edges.  It was trimmed down in order to fit a tall and skinny card, then gold embossing powder was heat set around the edges.


The sentiment was also heat set with gold embossing powder on Very Vanilla card stock, then adhered to a Real Red layer, both of which die cut with Tags & Labels Framelits.  After wrapping the panel with gold cord and popping the sentiment up with foam tape, the stenciled panel was adhered to the card base and a few Nuvo Crystal drops added.


Are you like me, making loads of cards but sending them infrequently or not at all? I recently decided to start mailing cards more often to family and friends, just to let them know I was thinking of them, and this card will be going to a special friend.

Thanks for visiting, I appreciate it so much!  I've added links above to The Paper Players and SCS above, so be sure to check out all the challenges.

Stef


Product details
Stamps:  Peaceful Place (sentiment/SU)
Paper:  Very Vanilla, Real Red, Early Espresso, Strathmore Bristol
Ink:  Festive Berries, Mowed Lawn, Scattered Straw, Antique Linen, Walnut Stain, Versamark
Other:  Tim Holtz Autumn Leaves Layering stencil, Tags & Labels Framelits (SU), Altenew Antique Gold embossing powder, Gold Cord, English Mustard and Woodland Green Tonic Nuvo Crystal Drops
 

Monday, October 1, 2018

Good Idea!

Hi there and welcome back!  It's time for a new Color Challenge at Splitcoaststampers!  Barbara is hosting this week and she has chosen the Old Olive, Fresh Fig and Pumpkin Pie for her colors this week, with a dessert option of "Halloween". 

I'm also joining the current challenge at The Paper Players, where LeAnne has given us a fun Tic Tac Toe challenge.  The elements I used are die cut, pumpkin and green.

PP 412

Normally I would love to make a Halloween card with this week's challenge colors, but I received my new Art Impressions/Simon Says Stamp collaboration stamp and could not resist coloring it up! 


Ha ha I love these AI ladies, hanging out sipping their Pumpkin Spice lattes while seated on big pumpkins.  It wouldn't seem very comfy but they don't seem to mind in the least!  I used the packaging example to create the shading on the ladies, cups and pumpkins, then expanded it onto the ground and background.  For the "wall" in the background, it was colored with a light warm gray then I used a small textured square drenched in Colorless Blender to create a bit of textured design (you can see it better in the photo below).  After the panel was die cut with a wonky stitched rectangle die, the sentiment was adhered and the panel added to a Fresh Fig card base.


Thanks so much for visiting, it's always so appreciated!  Be sure to use the links above to check out both challenges.  Have a great week!

Stef


Product details
Stamps:  Pumpkin Spice (AI/SSS), My Monthly Hero 0818 (sentiment/Hero Arts)
Paper:  Neenah Solar White, Fresh Fig
Ink:  Gina K Amalgam Black, Stazon Timber Brown (sentiment)
Other:  Wonky Stitched Rectangle die (SSS), Silver Sakura Gelly Roll pen, Copic markers: YR18, 12, 07, 04, R20, 21, 35, 39, 83 YG17, 91, 95, 97, C3, 5, W0, 1, 3, 5, BV20, 23, E00, 08, 11, 19, 29, 35, 37, 53, 55, 57
 

Sunday, September 30, 2018

Cattails

Hi there!  Today I'm sharing a card made for the current challenge at Color Throwdown, using the beautiful combination of aqua/turquoise, green and gray.


I've had a wonderful Cattail triptych die for a while that has been begging to be used, so I thought this color combo would work beautifully, with the green and aqua ink blended behind the die cut images.  I used Distress Inks on Bristol to create the background, then added the die cut panel with foam tape, lots and lots of little pieces of foam tape....


Keeping things simple I added a Tiny Words sentiment and some sequins to finish things off.


Thanks for visiting, it's always so appreciated!  I've added a link to the challenge above, so be sure to head over there and check out all the amazing inspiration!

Stef


Product details

Stamps:  Tiny Words (Simon Says Stamp)
Paper:  Neenah Solar White, Koh-I-Noor Bristol, Smoky Slate (SU)
Ink:  Crushed Olive, Peeled Paint, Peacock Feathers (Distress Ink)
Other:  Cattail Triptych die (SSS), Sparkling Clear Sequins (PPP)